


This is a step-by-step configuration tutorial for teams using AdsPower anti-detect browser for Facebook multi-account operations: from getting your IPNut proxy info to adding the proxy in AdsPower, creating an environment, and verifying it — every step has a screenshot. This tutorial only covers configuration; for Facebook usage, follow platform policies — no anti-ban promises are made here.
1. Preparation
Confirm two things before starting:
- IPNut account: purchased, with a usable static proxy IP in the dashboard (host, port, username, password)
- AdsPower: latest version installed (official site; supports Windows / macOS)
2. Get Proxy Info from IPNut
Log into the IPNut dashboard, go to “Proxy List,” and view your purchased static IP and its connection info:
Four pieces of info to note: Host, Port, Username, Password — you’ll need them in the next step.
3. Add the Proxy in AdsPower
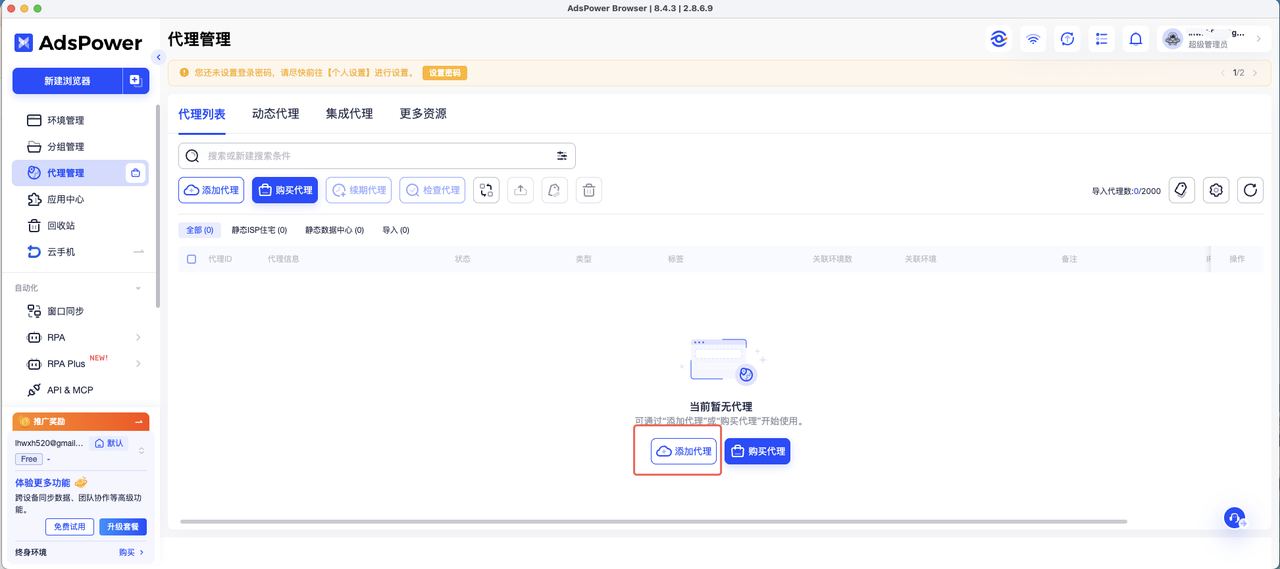
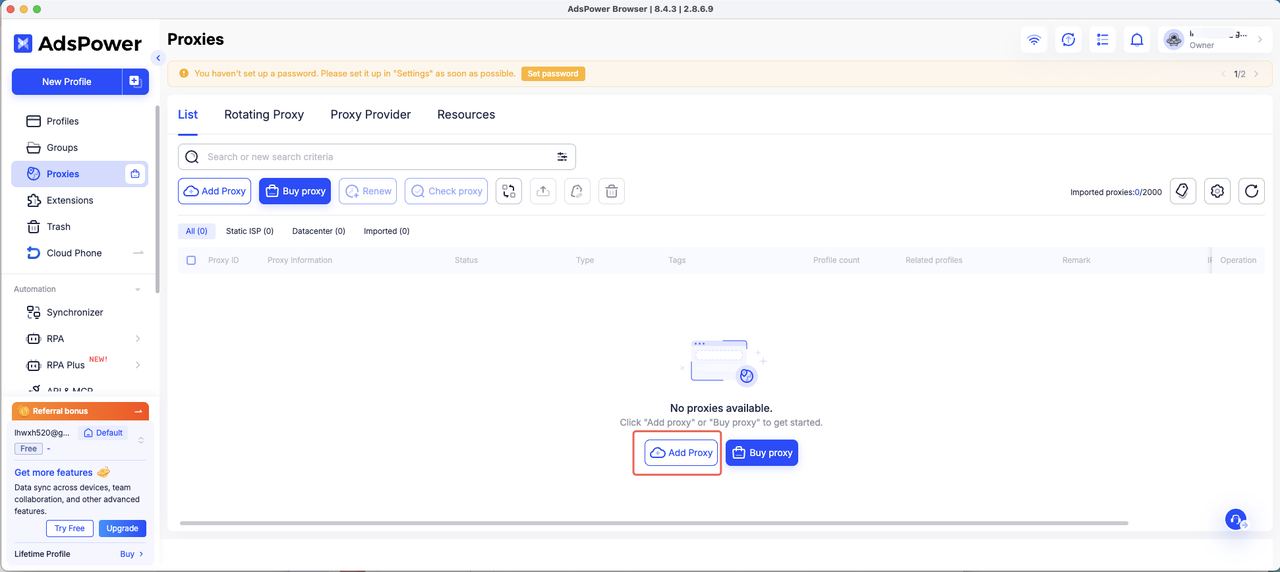
Open AdsPower, go to “Proxy Management,” and click “Add Proxy”:
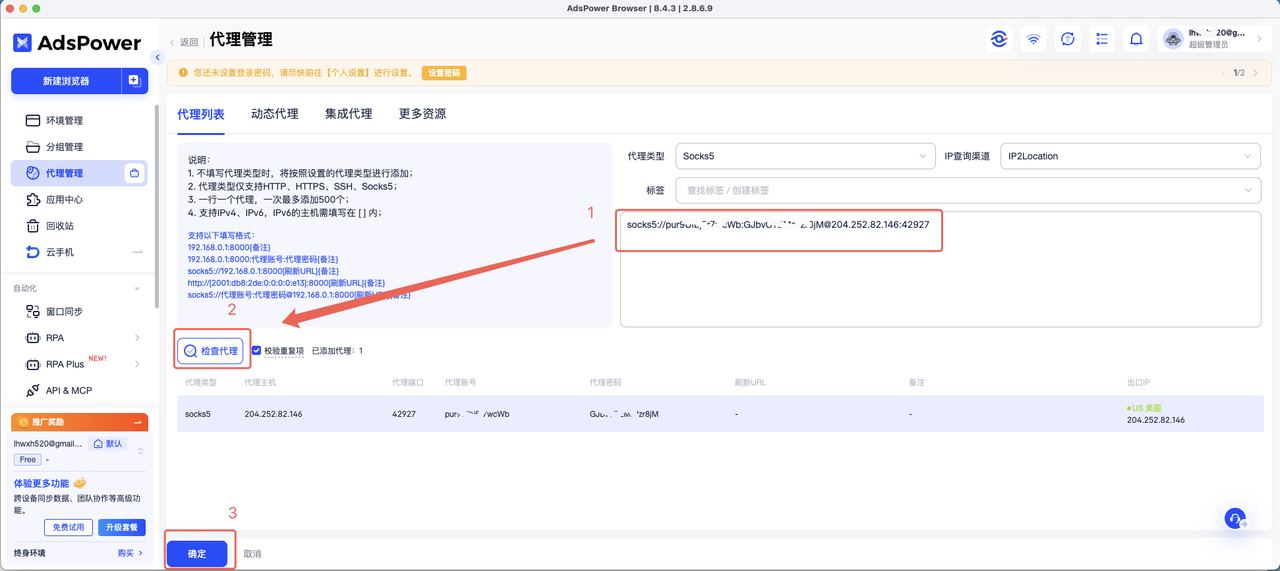
In the form, choose the proxy type and fill in the four pieces of info from IPNut:
- Proxy type: IPNut static IPs support HTTP/HTTPS and SOCKS5 — pick what you need (either works for Facebook operations; see the SOCKS5 vs HTTP proxy guide)
- Host/Port/Username/Password: copy from the IPNut dashboard
- Save after filling — the proxy is added
4. Create an Environment and Bind the Proxy
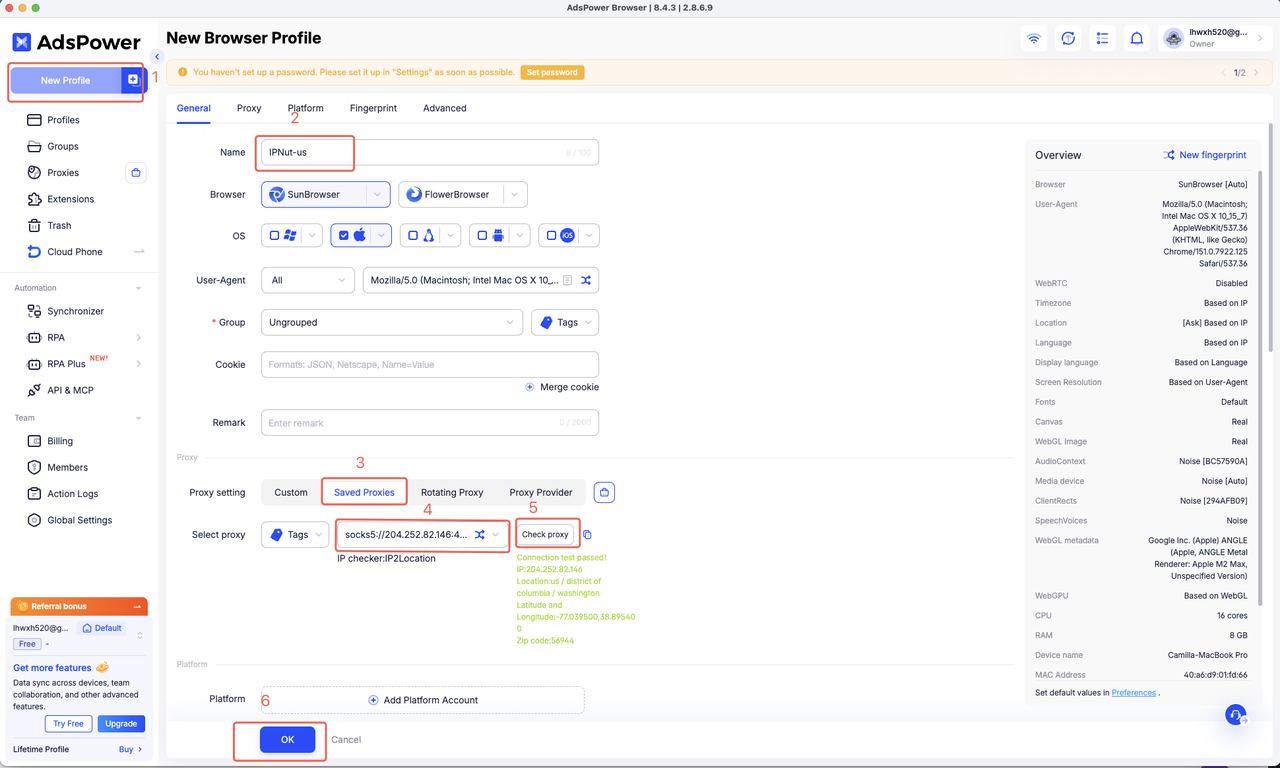
Go to “Browser Profiles,” click “Create Profile,” and select the proxy you just saved in the proxy section:
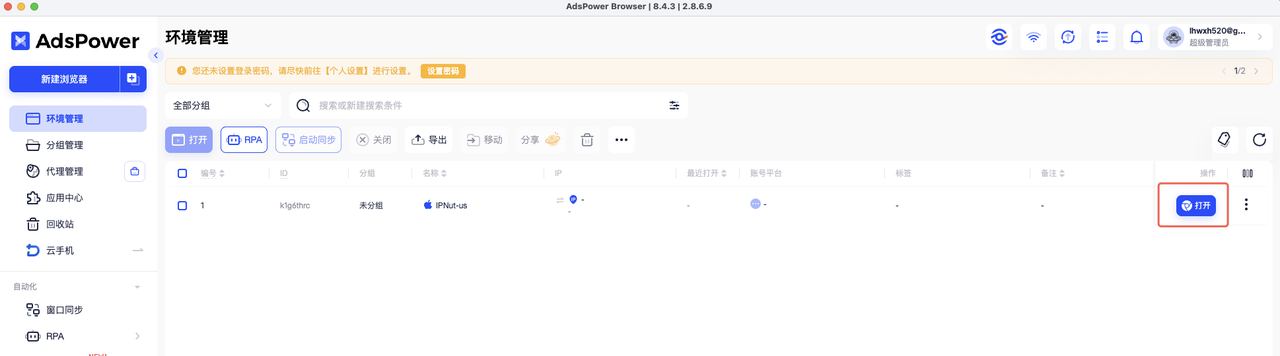
After creation, you can see it in the profile list — each profile is an independent browser fingerprint + a fixed proxy exit:
5. Open the Environment and Verify the IP
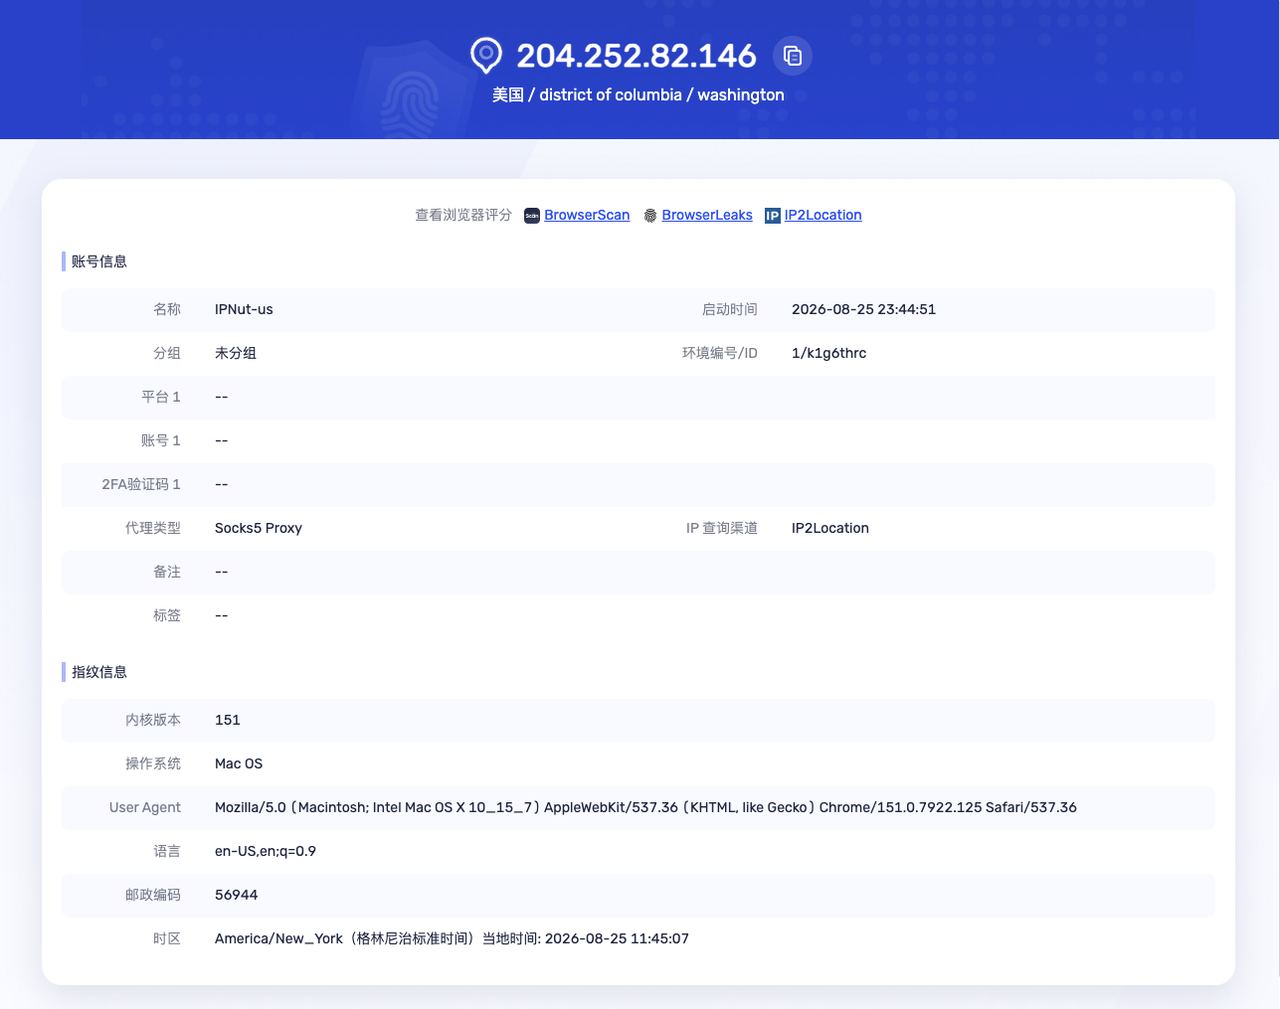
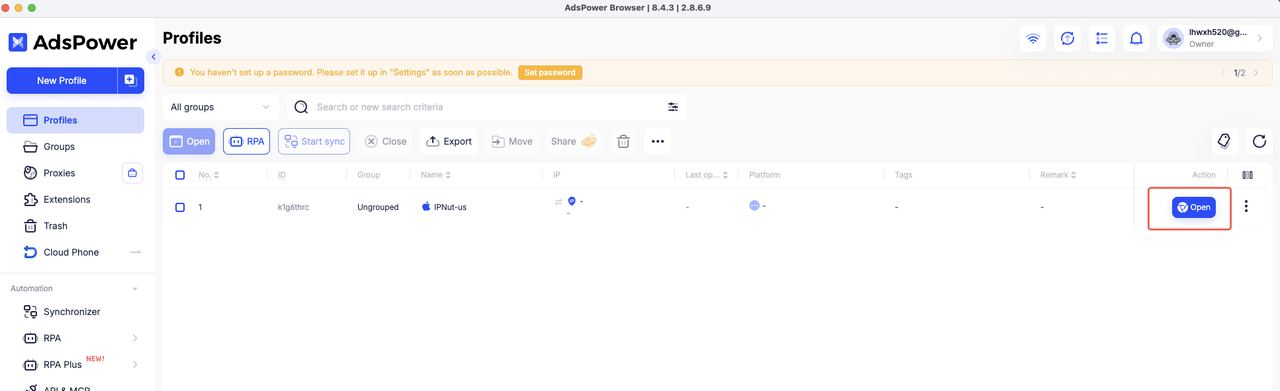
Click “Open” to launch the profile. Verification is the key step — after opening, check the in-browser IP info to confirm the exit IP:
Things to confirm:
- Does the displayed IP match the IPNut dashboard (fixed exit)?
- Is the network type marked residential/ISP?
- Does the region match your business target?
6. Log into Facebook to Verify the Environment
Once the environment is open and the IP verified, visit Facebook’s homepage inside the environment to confirm normal loading:
Once the Facebook page loads normally in the environment, you can start logging in and using it:
When logging into accounts, keep this environment on the same IP long-term and avoid frequent switching (for environment-stability thinking, see Fingerprint Browser vs Proxy IP).
7. FAQ
Q: “Proxy connection failed”?
A: First double-check the four info fields (host/port/username/password), then confirm the IP is within validity; if it still fails, test the IP’s connectivity directly.
Q: The page shows my local IP after opening the environment?
A: That’s usually a DNS/WebRTC leak — see the DNS/WebRTC leak fix guide.
Q: Can one IP serve multiple profiles?
A: Technically yes, but multiple profiles sharing one exit share network signals; allocate per your isolation needs (one profile one dedicated IP is safer).
8. Summary
Configuring IPNut Static Residential ISP in AdsPower is four steps: get proxy info → add proxy → create profile and bind → open and verify. The key is step 5 — confirm the exit IP, type, and region are correct before putting it into production. Keep the environment fixed and stable; with fingerprint management, your account-operations foundation is set.
Two usage suggestions:
- Start with low-value test accounts first: after a new environment and IP go live, run non-core test accounts for a while to confirm stability before moving main accounts in — don’t expose important accounts to an unverified environment.
- IP is just one dimension: the network environment (IP) is one part of account operations, not everything — content, behavior patterns, and operating cadence matter just as much. A solid IP environment is the foundation, but don’t pin all expectations on “switching IPs”; doing every dimension well is the reliable approach.
For a stable fixed exit IP, IPNut‘s Static Residential ISP supports both HTTP/SOCKS5; for batch data tasks, use Static Datacenter IPs.