


This is a hands-on tutorial for configuring IPNut Static Residential ISP (SOCKS5) in the Hubstudio anti-detect browser: from getting proxy info, creating a profile with SOCKS5, checking the proxy connection, to third-party IP detection and real-platform access verification, plus troubleshooting for common errors. It covers configuration and verification only — no account operations, anti-ban, or platform-review content.
1. Preparation
- IPNut account: a static proxy purchased, with connection info available in the dashboard
- Hubstudio: latest version installed (the interface may vary slightly by version; the paths below reflect actual operation)
2. Get Proxy Info from IPNut
Log into the IPNut dashboard and find your static IP and its connection info in the proxy list:
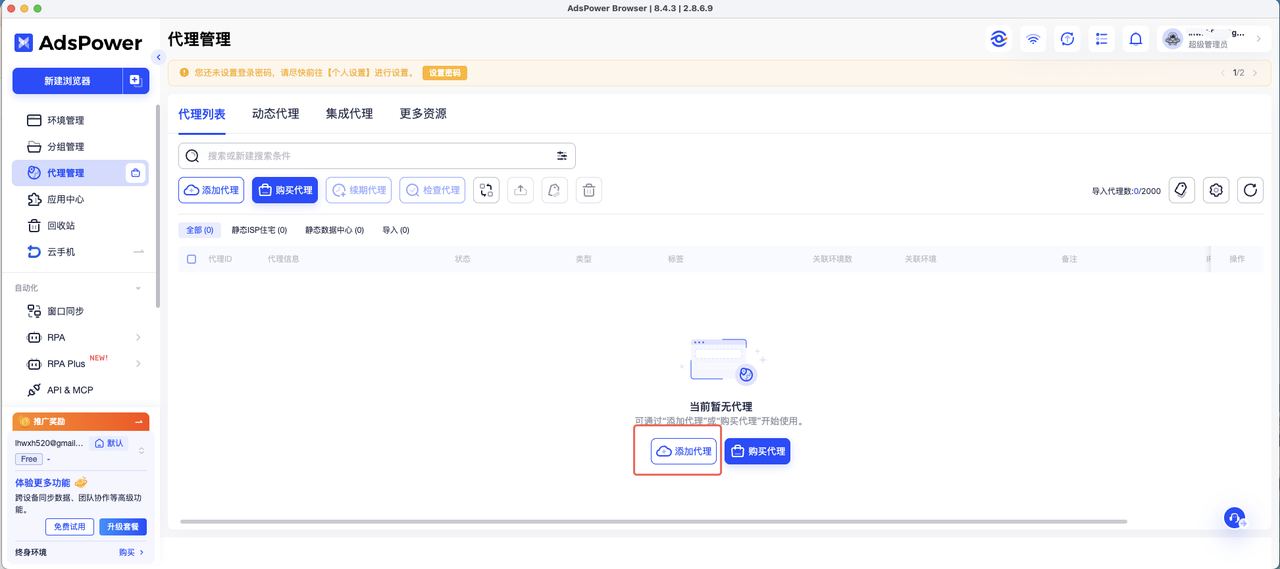
What you need:
- Host
- Port
- Username
- Password
- Proxy protocol: IPNut static IPs support HTTP/SOCKS5 — this tutorial uses SOCKS5 as the example
3. Create a Profile in Hubstudio and Configure SOCKS5
Hubstudio lets you configure the proxy directly when creating a profile; the entry point and interface may vary slightly by version. Compared with AdsPower, the two differ in their proxy-configuration entry points.
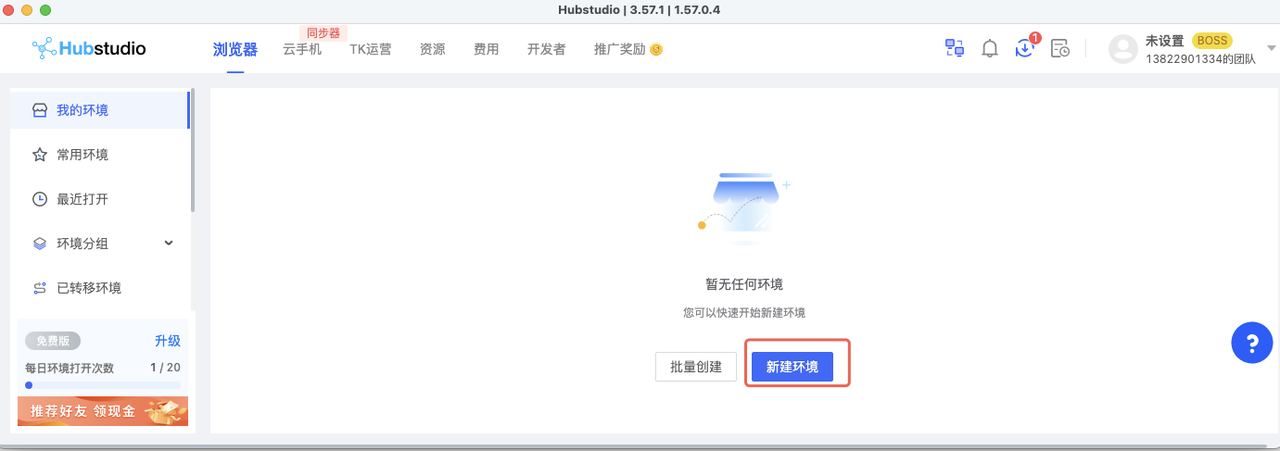
Open Hubstudio and go to “My Profiles.” On first use the list is empty — click “New Profile”:
In the “Proxy” tab, select “Custom” and fill in:
- Protocol: SOCKS5
- Host / Port / Username / Password: copy from the IPNut dashboard
Then click “Check Proxy”:
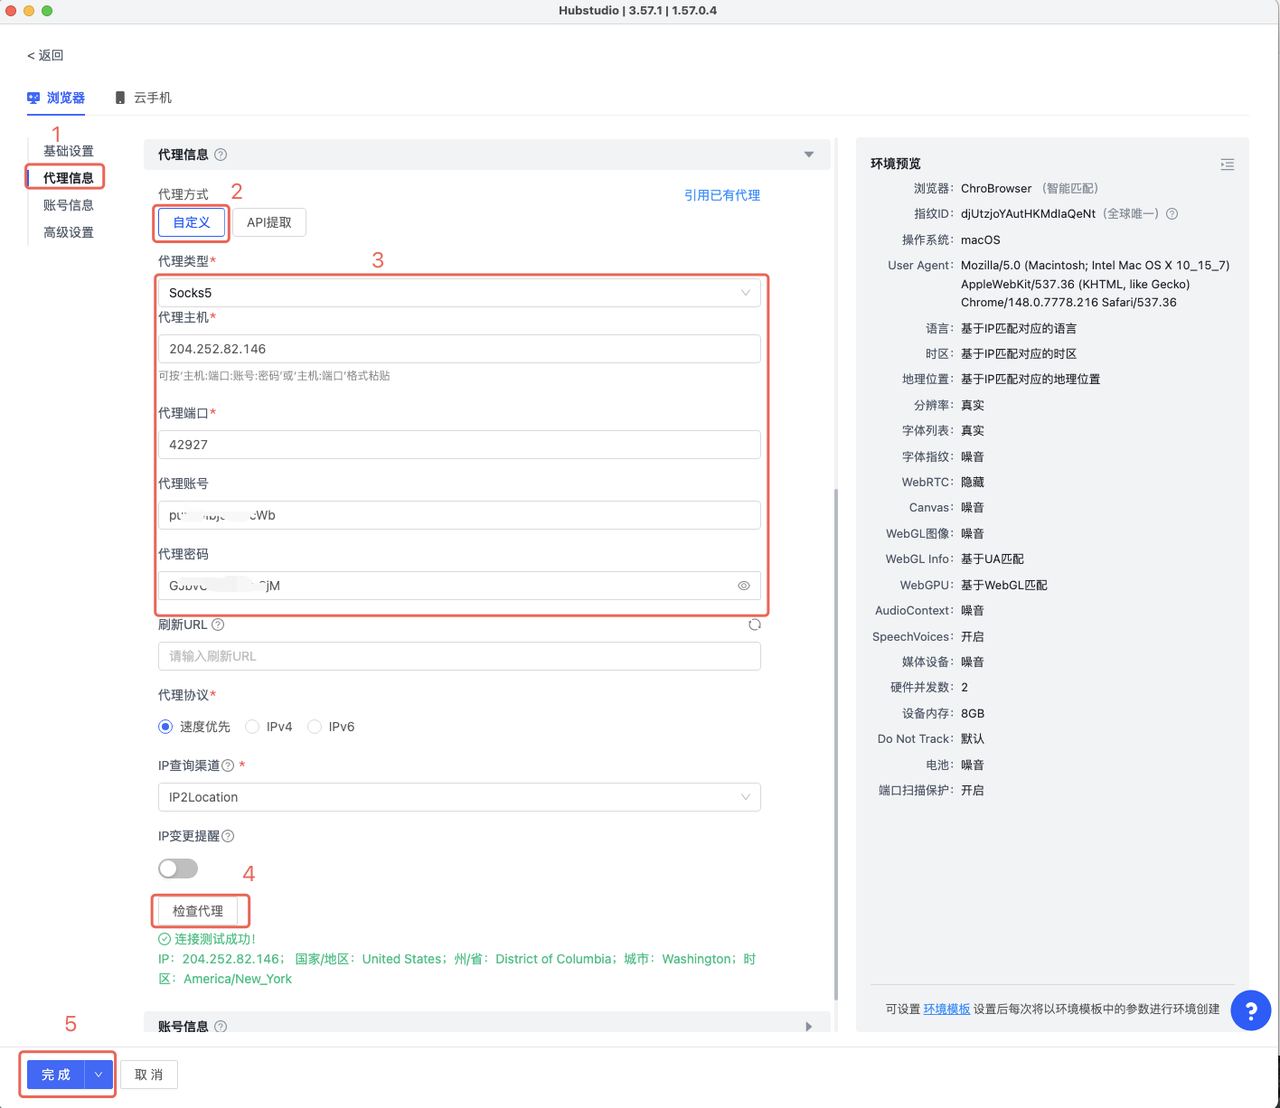
A successful check means Hubstudio can currently establish a connection through that proxy; a second verification in the actual environment is still recommended — one connection test doesn’t mean every website and business scenario will definitely work.
If the check result includes country/region info, first confirm it meets expectations. Different GeoIP databases may show location differences, so don’t judge an IP’s final region from a single detection website (see why proxy IP geolocation is often inaccurate).
4. Open the Profile and Run a Third-Party IP Check
After creation, the profile appears in the list — click “Open”:
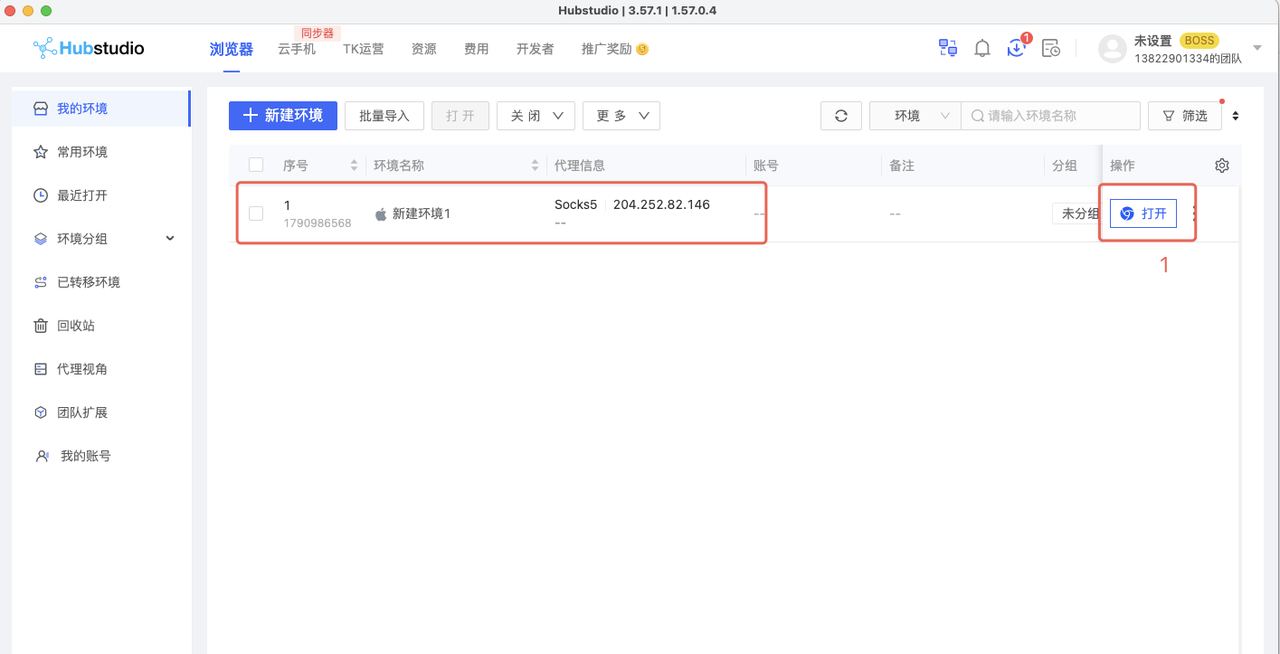
Once the profile is open, first use a reliable third-party IP detection site to confirm the current exit IP has switched to the configured proxy IP, and check basic info like country/region. After confirming the proxy is in effect, visit the actual platform to verify.
Verification logic: Hubstudio proxy connection test → third-party IP detection → real target-platform access test — all three layers passing means the environment is fully configured and usable.
5. Verify by Accessing the Actual Platform
After the third-party check confirms the exit IP is correct, open the target platform (e.g., Instagram) inside the profile to confirm normal access:
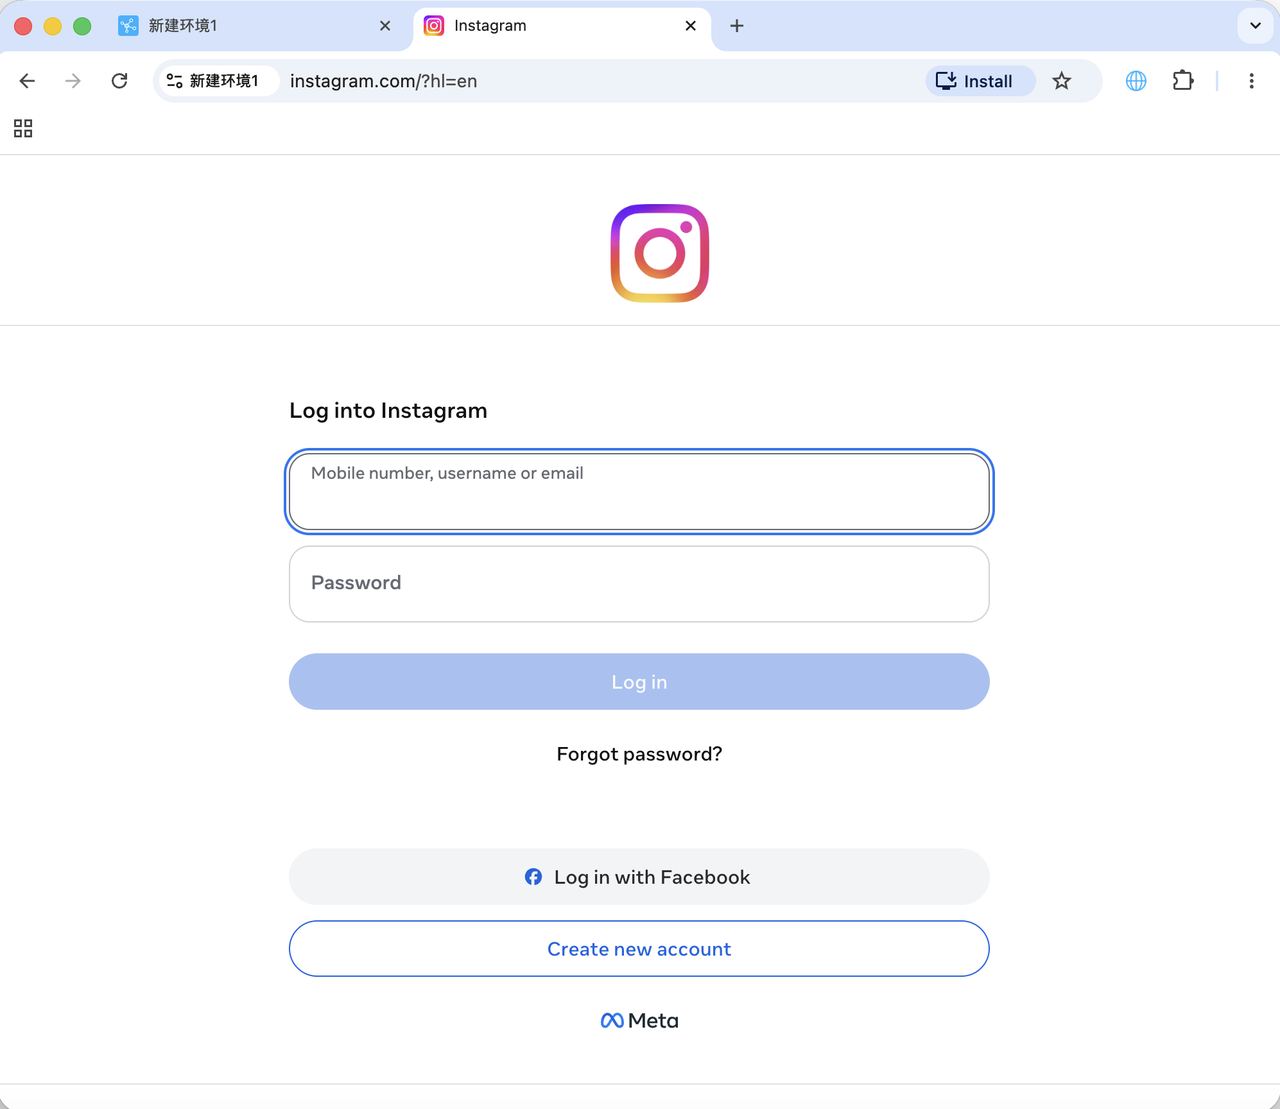
For long-term management of the same account, keep the browser environment config and network exit as stable as possible to reduce extra variables from frequent changes. A stable network and browser environment mainly helps maintain operational consistency; it does not mean you can circumvent platform review, identity verification, or platform rules.
6. Common Errors
Q: Proxy check fails / connection timeout?
A: Check in order:
- Is SOCKS5 selected as the protocol?
- Are host and port correct?
- Are username and password correct?
- Is the IP still within its validity period?
Retry after confirming no copy errors in the proxy info. If Hubstudio still can’t connect, use another standard proxy testing tool or actually visit a website to cross-verify, and determine whether it’s a proxy-parameter issue or a Hubstudio environment-configuration issue.
Q: The profile shows my local IP after opening?
A: First confirm the proxy config in the Hubstudio profile is correct and check whether the actual exit IP has changed. If the proxy config is fine but the detection site still shows a local network address, then further investigate WebRTC, DNS, or other traffic bypassing the proxy (see the DNS/WebRTC leak troubleshooting guide) — “showing local IP” isn’t necessarily only a DNS/WebRTC cause.
Q: Why does the proxy check succeed but websites still won’t open?
A: A successful proxy check usually only means the current connection test passed, not that every target website will definitely load. First confirm the actual exit IP in the profile, then visit other ordinary websites for comparison. If other sites work and only a specific platform doesn’t, further judge whether it’s the target platform’s own access restriction or other environmental factors.
Q: What’s the difference between Hubstudio and AdsPower config?
A: The main difference is the proxy-configuration entry point and profile-creation flow. This tutorial uses Hubstudio’s approach of filling in proxy info directly when creating a profile; for the AdsPower flow, refer to the AdsPower + IPNut configuration tutorial.
7. Summary
Configuration is three steps: get proxy info → create a Hubstudio profile, configure SOCKS5 and check → verify via third-party IP detection and the actual target platform.
The key is completing multi-layer verification: first confirm proxy parameters and connection are fine, then confirm the actual exit via third-party IP detection, and finally verify real access on the target platform. Keeping the network environment stable helps reduce unnecessary environment changes, but it is not a way to circumvent platform review or guarantee account security.
If your business needs a long-term fixed network exit, choose a static residential ISP that supports HTTP/SOCKS5. When choosing, focus on IP region ownership, proxy protocol, connection stability, and actual access on the target platform. IPNut provides Static Residential ISP proxies — you can obtain host, port, username, and password connection info in the dashboard; for data tasks, use Static Datacenter IPs.